Having virtual machines on Apple M2 Pro - even better
VMware Fusion on M2 Pro
VMware Fusion does run well on Apple M2 Pro. Nevertheless, it suffers from a performance issue. Certain write-to-disc operations take very long. It happens quite often, that you, e.g. clone a repository and have to wait for about 30 seconds, after the operation finished, until your prompt returns. This is nothing specific to git, but happens to all kind of actions. It looks, as if there is a problem in writing data to the virtual disc or using the attached cache or whatsoever. And it happened with different guest OSes.
I could not find out, what it is. As this is closed source, there is no reasonable way to find the root cause. I updated Fusion to the Public Tech Preview 2023, that was released a couple of weeks ago, hoping, that this would fix the issue. It went better, but the issue was still there.
An even better alternative
Searching for an alternative, I found UTM , a virtualization tool for macOS and iOS, that employs Apple’s Hypervisor virtualization framework to run ARM64 operating systems on Apple Silicon at near native speeds. That sounds good and is good!
Getting the App from the App Store
It’s unbelievable, but the app is free! You can get it from the link above or at the App Store. I recommend, to buy it at the App Store for only 10 Eur, which supports further development and ensures, that you’ll be notified about updates of the app, once installed.
Retrieving your VM
UTM even provides pre-defined VMs, ready to download and install on your computer. That’s fantastic - even an ARM64 Arch Linux VM is available. The only thing that needs to be noticed is, that you should use the download link to get the VM. There is a second option in the UTM app gallery - a web page that lists available VMs for your platform - for the VM to start: “open in UTM”. This lets you start the VM, but it is only available within UTM until the next reboot of your host.
As we want a permanent VM, that is stored on the SSD, we go for the first option.
Configuring the VM
The pre-defined Arch Linux VM has a disc space of 10 GB and 2 GB of RAM configured. I need an Arch system, that runs a desktop environment, so these need to be changed.
So let’s alter the preferences of the VM:
RAM
The RAM setting can be changed directly in the VMs settings in the System tab.
Display
Same with the display settings. The display settings are missing in the VMs settings, but can easily be added in the Devices tab > New … . I’ve chosen virtio-ramfb-gl (GPU supported), that gives me a fast display of the VM in the native Retina resolution of the host. Also check, that the display size gets adjusted to the window size and enable the Retina-Mode.
Virtual disc
The disc has a size of 10 GB, which is too less for a non-server OS. We need to increase it. The instructions to do so are taken from Siytek’s blog1. Many thanks to Simon Ogden.
- Increase virtual disc
- Resize in the UI
- Resize the partition
- Resize the file system
First, you choose the VirtIO drive in the VMs settings and resize the drive with the Resize button. As this increases the virtual disc, the Linux partition on the virtual disc needs to be increased too.
- Increase virtual disc
- Resize in the UI
- Resize the partition
- Resize the file system
To do this, start the VM and, on the CLI, enter:
1
fdisk -l
This lists your discs, attached to your VM and informs you with a size mismatch error, that the virtual disc was increased. That’s good and what we did.
The output above also shows us, that the partition /dev/vda2 still has its old size. So let us change this too.
We start the disc partitioning tool by entering:
1
fdisk /dev/vda
Hit p to print the partitions. Partition /dev/vda2 is the second in the list, so we can delete it with d 2. Never mind: the data of the installed Arch OS gets preserved.
Next, type n at the prompt to create a new partition. We will recreate the primary partition, filling the entire free space. Enter the primary partition number, it’s 2 again.
Important: when prompted to remove the signature, enter
Nto keep the installed Arch OS data.
When you type p now, it shows that the partition takes all remaining space of the virtual drive. We are nearly done.
Don’t forget to hit
wto write your changes to disc.
Exit fdisk and reboot your VM.
The last necessary step is to resize the file system.
- Increase virtual disc
- Resize in the UI
- Resize the partition
- Resize the file system
On the CLI, enter:
1
resize2fs /dev/vda2
Now, when you check the free disc space, the primary root partition has been expanded into the newly created disk space:
1
df -h
Some obstacles, that need to be circumvented
After having the VM configuration ready to install a desktop environment, this should easily be possible. I hit a couple of smaller issues doing so, but they all could be solved.
libcrypto.so.1.1 is missing
Using pacman to install the required software led to the error message above quite quickly. From the first time, pacman complains about the missing shared library, it’s impossible to use pacman to fix this or install more packages without manual intervention.
The easiest way to avoid this situation is to install openssl-1.1 the first time you use pacman. openssl-1.1 provides libcrypto.so.1.1 :
1
pacman -S openssl-1.1
Dependency conflict between gedit and gedit-code-assistance
My favorite desktop environment is GNOME. On installing the gnome and gnome-extra groups, pacman complains, that gedit and gedit-code-assistance conflict with each other. This is not a problem on x64 and I don’t know why this is an issue on ARM64.
Personally, I don’t use gedit anyway and solved this by excluding both packages from my installation:
1
pacman --ignore gedit gedit-code-assistance -S gnome gnome-extra network-manager-applet networkmanager
After the GNOME desktop environment has been installed and started, two small problems remained.
Installed packages are not up-to-date
Although I synchronized the repository databases with pacman -Syy before installing packages, the final system had quite a few packages installed, that were not up-to-date. This can easily be solved by updating all installed packages:
1
pacman -Syu
Application icons and tray icons are blurry and missing
The final problem was kinda surprising too, and I never experienced it on installing the GNOME desktop environment before. The applications and tray icons were broken and looked like this2:
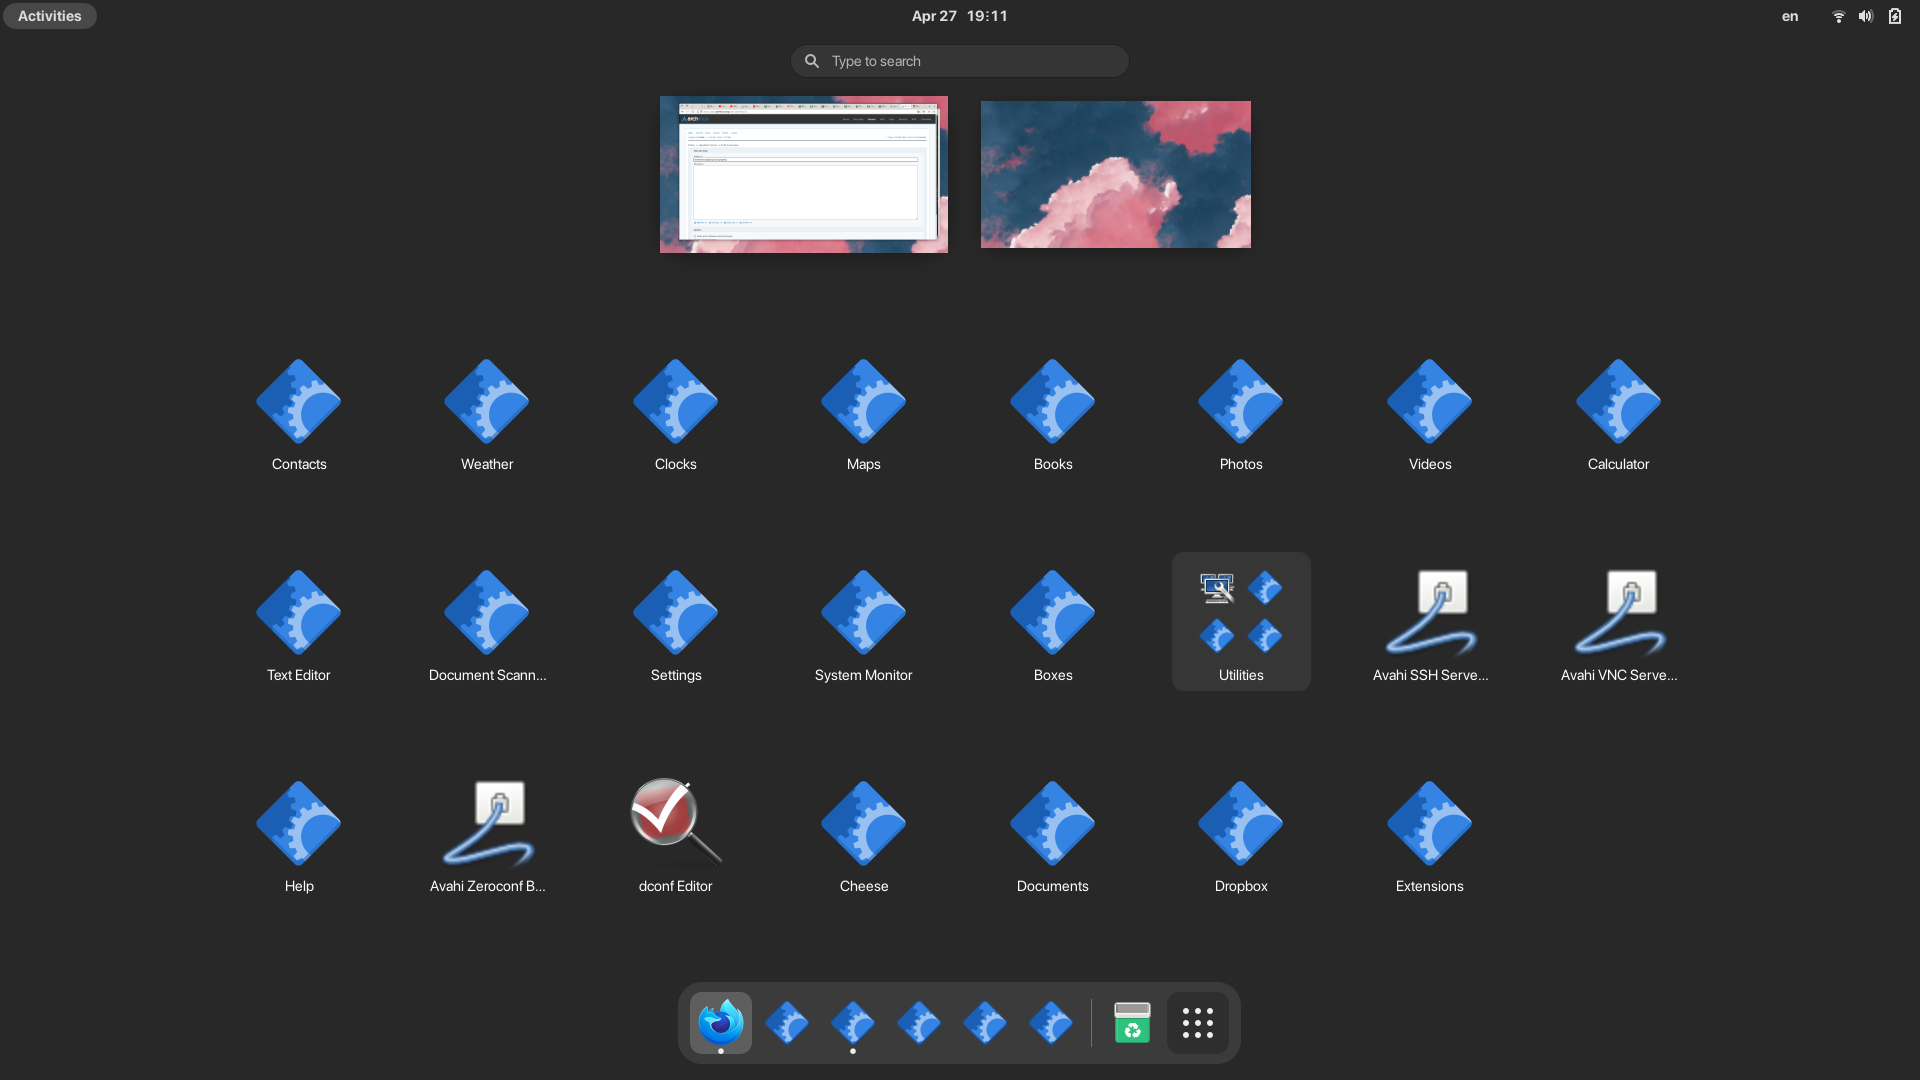 GNOME not displaying icons properly
Analyzing this led to the cognition, that there is one library, that is responsible to render all SVG icons. Re-installing it fixed this issue:
1
pacman -S librsvg
I have no idea, why the packages mentioned above weren’t up-to-date on installing them. This might have been a one-off problem with synchronizing the repository databases. As all the issues could be solved quickly, I did not analyze the root cause any further.
Footnotes
Screenshot borrowed from a similar issue. ↩︎